> For the complete documentation index, see [llms.txt](https://support.caspen.com/llms.txt). Markdown versions of documentation pages are available by appending `.md` to page URLs; this page is available as [Markdown](https://support.caspen.com/using-caspen/catalog/services/add-buffer-times-to-services.md).
# Add buffer times to services
Learn how to add buffer time to individual services and appointments.
## How buffers work
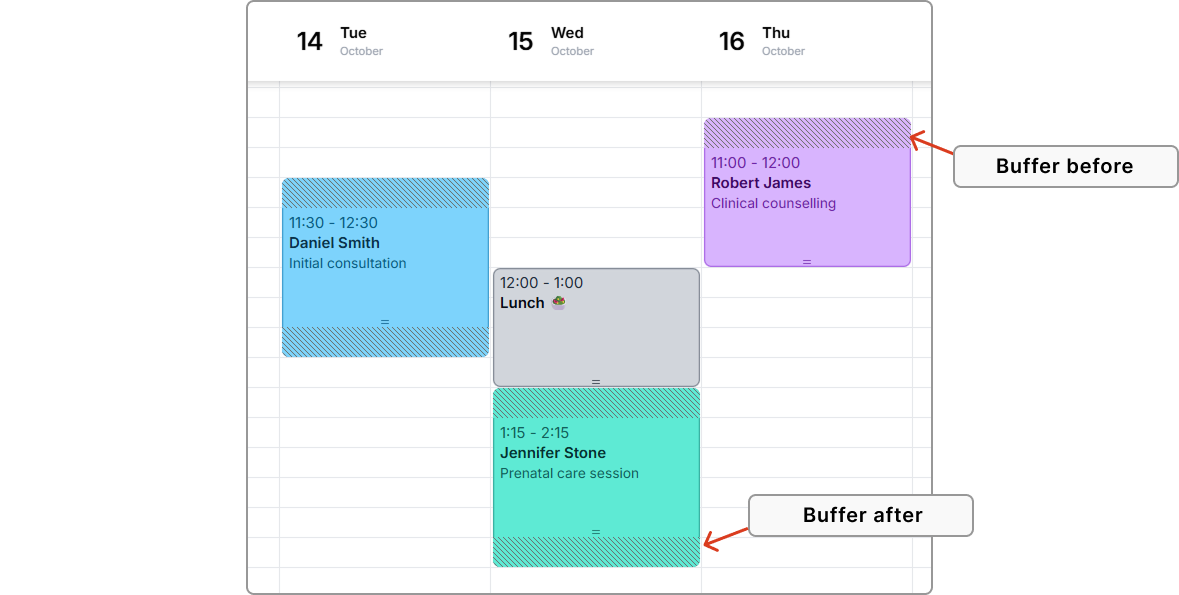
If you need extra time before or after your appointment, you can set **buffer times**. This time is blocked in your calendar and in online bookings to prevent back-to-back clashes and to reflect the real time needed. Buffers do not overlap existing calendar events, so bookings respect any buffer you set. The client is not present during buffer time.
In the calendar, the service duration **plus** **buffers** is all blocked for the practitioner.
* **Buffer before:** Minutes reserved before the start (e.g. setup or preparation).
* **Buffer after:** Minutes reserved after the end (e.g. notes, clean up, or admin).
Calendar showing buffer before and buffer after on appointments.
{% hint style="info" %}
**Tip:** Use buffers on longer or admin-heavy services to keep your day realistic and avoid overruns.
{% endhint %}
***
## How to add a buffer time
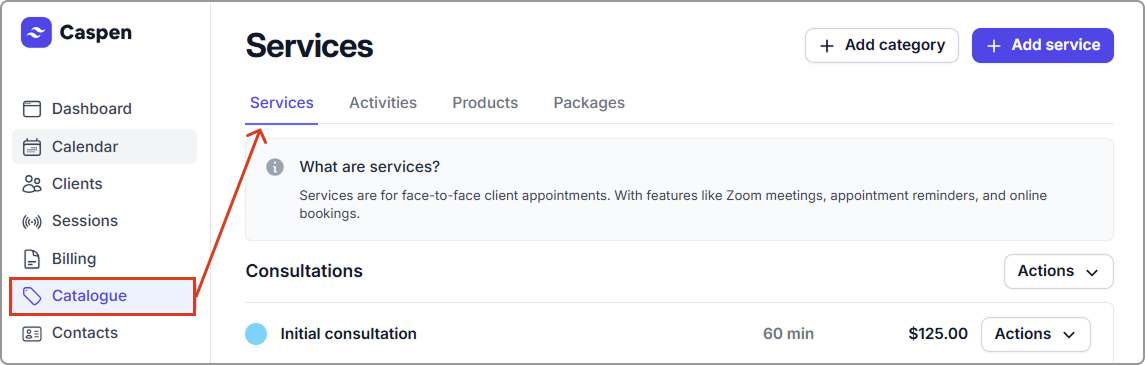
1. Go to **Catalog** → **Services**.
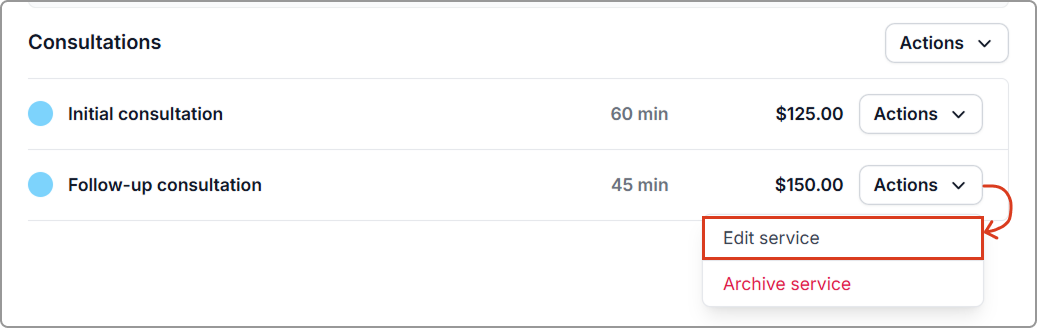
2. Open the service, then click **Actions** → **Edit service**.
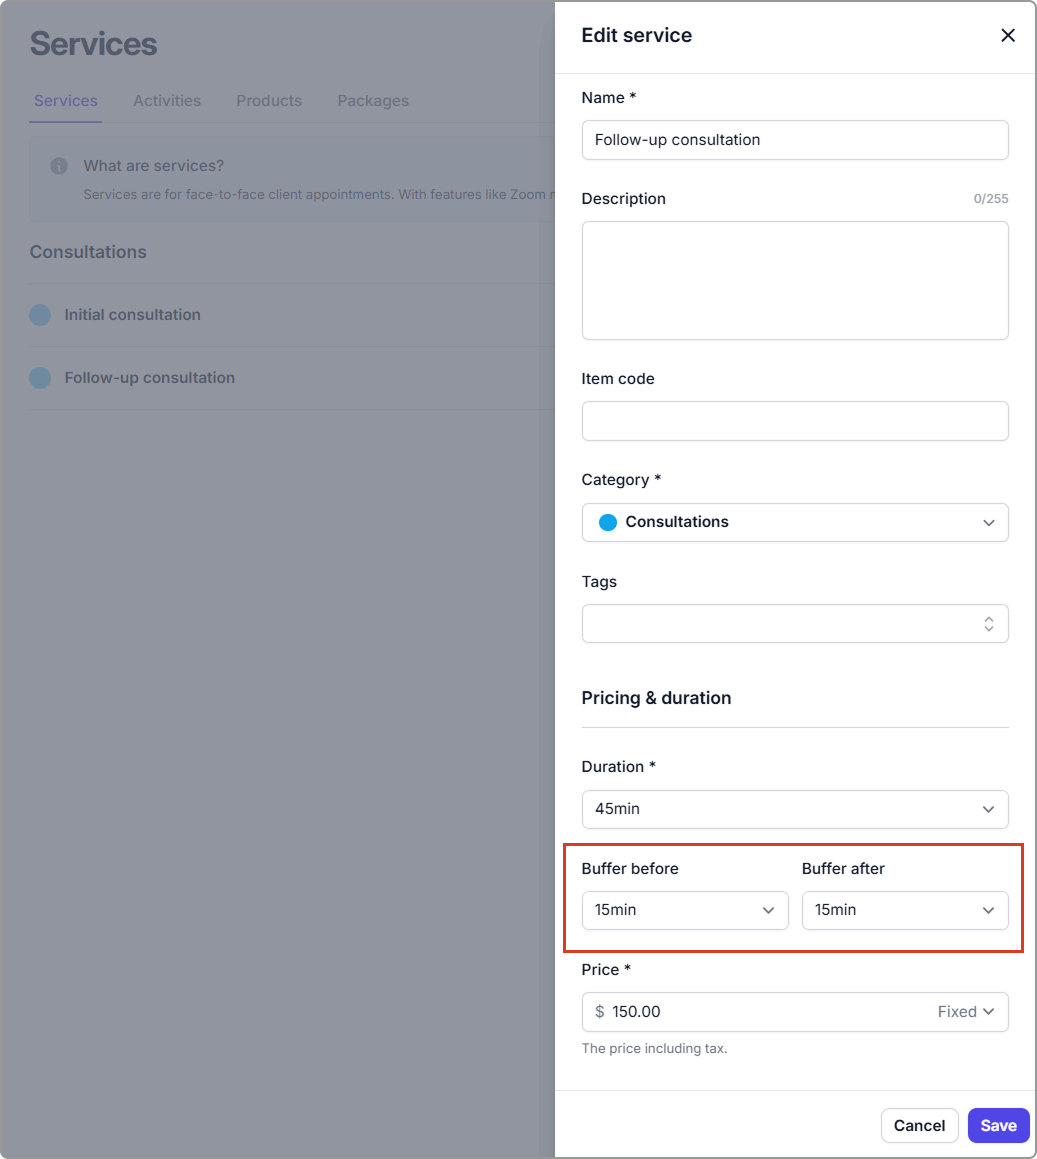
3. In **Pricing & Duration**, set **Buffer before** and/or **Buffer after**.
4. Click **Save**. The calendar and online bookings now respect the buffer time for this service.
**Buffer options:** 0 min, 15 min, 30 min, 45 min, 1 h, 1 h 15 min, 1 h 30 min, 1 h 45 min, 2 h. \
*Setting **0 min** means no buffer.*
**Example:** A 45-minute service with 15 min buffer before and 15 min buffer after blocks **75 minutes** in the calendar.
***
## Change or remove buffers
1. Go to **Catalog** → **Services**.
2. Open the service, then click **Actions** → **Edit service**.
3. **Adjust the buffer fields** (set to **0 min** to remove).
4. Click **Save** to apply changes.