> For the complete documentation index, see [llms.txt](https://support.caspen.com/llms.txt). Markdown versions of documentation pages are available by appending `.md` to page URLs; this page is available as [Markdown](https://support.caspen.com/using-caspen/tasks.md).
# Tasks
Learn how to create, schedule, prioritize, and complete tasks to stay organized.
## Overview
The Tasks page gives you a complete view of your to-do list. You can:
* Add and edit tasks.
* Set due dates and priorities.
* Reorder tasks by dragging.
* Mark tasks as complete.
* Review overdue, upcoming, and unscheduled work.
Tasks are **private to you** and are not visible to other users.
To open the Tasks page:
* Go to **Tasks** in the left navigation, or
* From the Dashboard, select **View all** in the **Today’s tasks** panel.
### Tabs explained
The table below explains what each Tasks tab shows, working from left to right.
| Tab | What it shows |
| --------------- | ----------------------------------------------------------------------------------------------------------------------------------------------------- |
| **Unscheduled** |
Shows tasks without a due date.
Good for general reminders or work that isn’t tied to a specific day or due date.
|
| **Today** |
Lists all tasks due today, plus any overdue ones grouped above today’s list. Overdue tasks display in red, with the number of days overdue.
|
| **Upcoming** | Shows tasks due within the next six months, organized by date. |
| **Completed** | Displays tasks you have marked as complete. Visible for the current day and the past 14 days. |
***
## Add a new task
To add tasks for specific dates:
1. Go to **Tasks**.
2. Select the tab where you want the task to appear:
* **Unscheduled** → for no due date.
* **Upcoming** → choose a date section.
* **Today** → if due today.
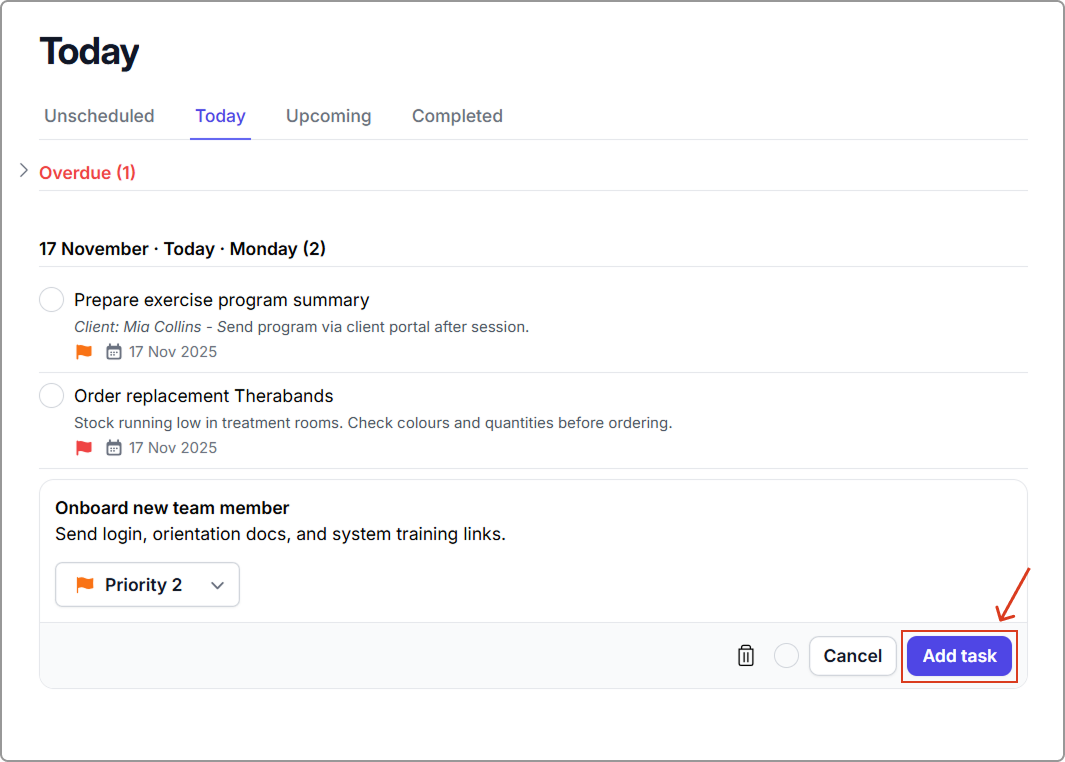
3. Click **+ Add task.**
4. Complete the task details.
* Enter a title and description.
* Choose a priority if needed (Priority 1–3 or No Priority).
5. Click **Add task** to create your new task.
***
## Edit a task
To update any task:
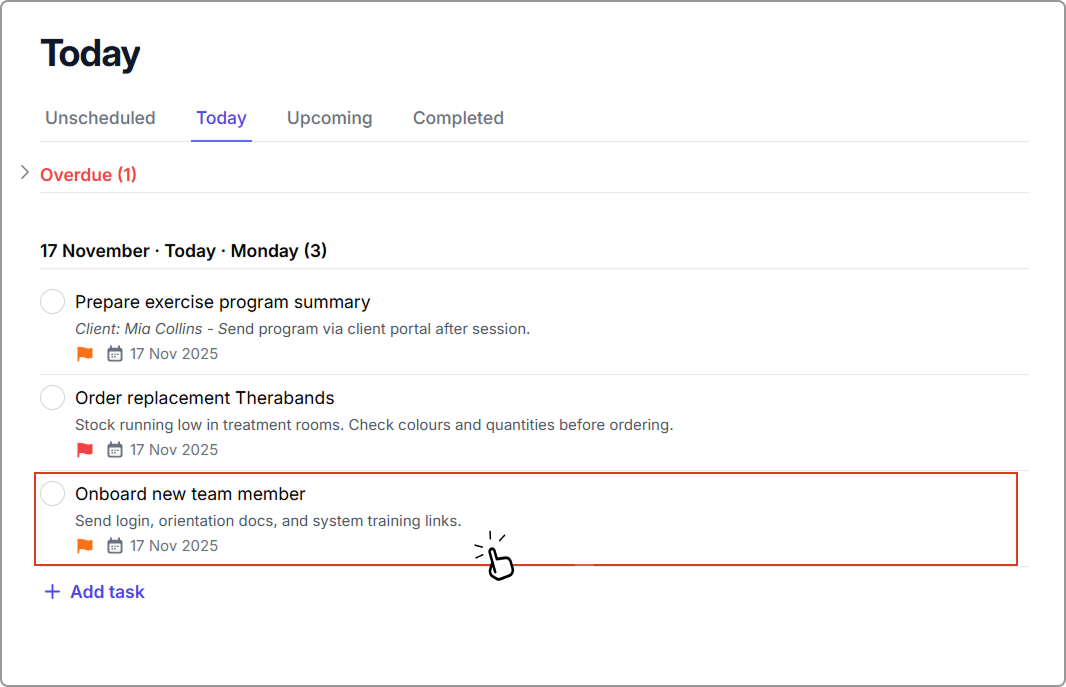
1. Click anywhere on the task (except the circle checkbox).
2. Update the title, description, due date, or priority.
3. Click **Save task** to apply your changes.
> Note: If you change the due date, the task will automatically move to the date it is now due.
***
## Prioritize tasks
You can assign priority levels to highlight urgency:
| Priority | Meaning | Color |
| ------------- | --------------------------------- | ------ |
| 🔴 Priority 1 | Urgent or high-impact | Red |
| 🟠 Priority 2 | Important but less time-sensitive | Orange |
| 🔵 Priority 3 | Low-priority or routine | Blue |
| ⚪ No Priority | Default | White |
***
## Mark a task as complete
1. Click the circle checkbox next to the task.
2. The task moves to the **Completed** tab automatically.
***
## Delete a task
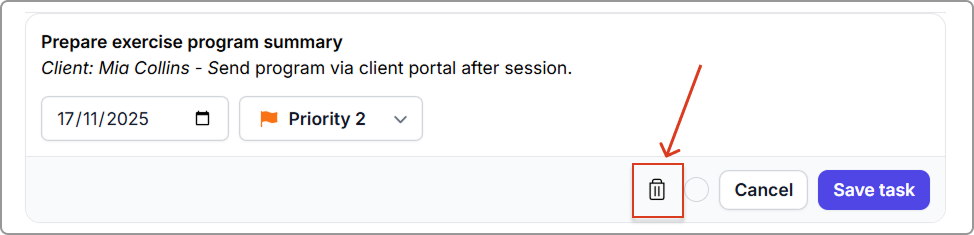
1. Click anywhere on the task (except the circle checkbox).
2. Select the **bin icon** to delete the task.
> Once deleted, a task cannot be recovered.
***
## Reorder tasks (drag and drop)
To rearrange tasks:
1. Click and hold a task (not the checkbox).
3. Drag it into a new position.
4. Release to save the new order.
***
## Tips for staying organized
* Add due dates to avoid missed follow-ups.
* Use priorities to focus on what matters most.
* Review the Upcoming tab at the start of each week.