> For the complete documentation index, see [llms.txt](https://support.caspen.com/llms.txt). Markdown versions of documentation pages are available by appending `.md` to page URLs; this page is available as [Markdown](https://support.caspen.com/using-caspen/settings/add-custom-client-fields.md).
# Add custom client fields
Create additional fields to record client details that are not included in Caspen’s standard fields.
## Overview
Custom fields let you collect additional client information that is not included in Caspen’s standard fields. Once created, custom fields appear on every client profile and can be filled out at any time.
Use custom fields to record details that match your practice, clients, and workflows.
**Custom field types**
You can create these custom field types:
* Short text (single line)
* Long text (multi line)
* Single choice (radio)
* Multiple choice (checkboxes)
* Dropdown (single select list)
* Number
* Date
* Yes or No
Note: You cannot change a custom field type after it is created. If you need a different type, create a new custom field.
***
## Add a custom field
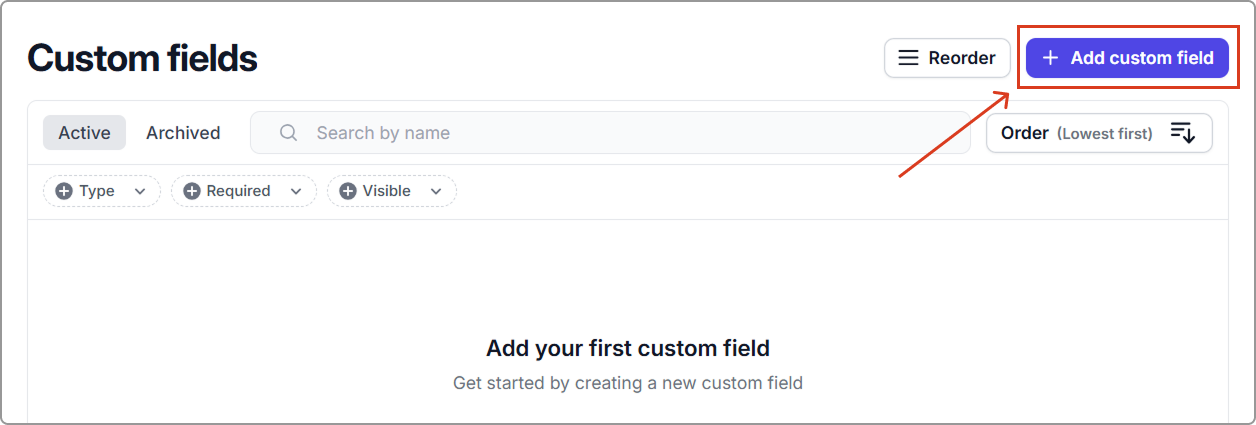
1. Go to **Settings** → **Custom fields**.
2. **Click Add custom field**.
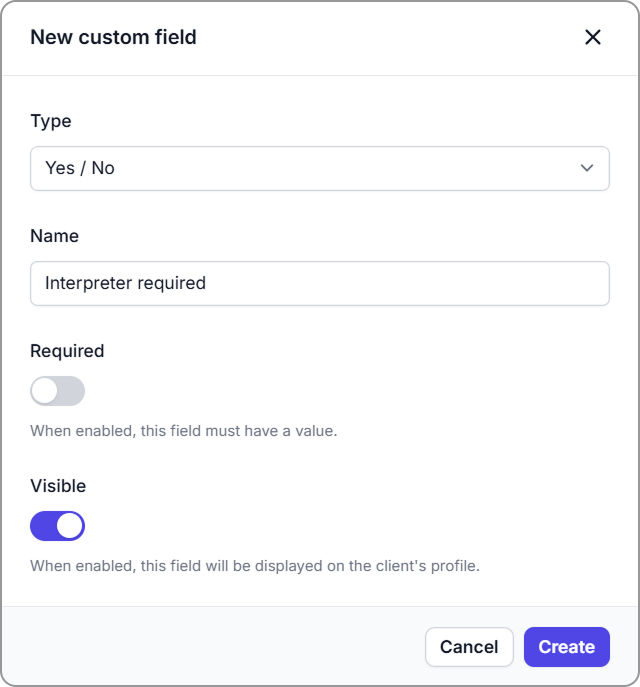
3. **Enter the field details:**
* **Type:** Choose the field type.
* **Name:** Give the field a clear label.
* **Visible** (toggle):
* On: The field appears on the client profile.
* Off: The field is hidden on the client profile and only appears when editing the client.
* **Required** (toggle): Turn this on if the field must be completed before a client record can be created or saved.
4. If the field uses options (Single choice, Multiple choice, Dropdown), add the options.
5. Click **Create** (bottom-right) to add the custom field.
**Result**
* Your custom field is available on client records and can be filled out as needed.
* If a field is not visible, it will not show on the client profile. You will still see the field when editing the client.
***
## Reorder custom fields
Reorder fields to control the order they appear on the client profile.
1. Go to **Settings** → **Custom fields**.
2. Click **Reorder**.
3. Drag and drop fields using the **drag handle** (left icon) to change the order.
4. Once complete, click **Save order**.
***
## Edit a custom field
Use this to update a custom field’s settings (name, visibility, required), and for choice fields, the available options.
> Note: You cannot change the field type after the custom field is created. If you need a different type, create a new custom field.
1. Go to **Settings → Custom fields**.
2. Find the field and click **Actions → Edit**.
3. Update the field settings, then click **Save**.
What happens to existing client data
* You can rename a field or change its visibility or required setting without losing any client data already saved in that field.
* For fields with options, renaming an option updates that option everywhere it is used.
***
## Archive a custom field
Archive a custom field when you no longer want it used.
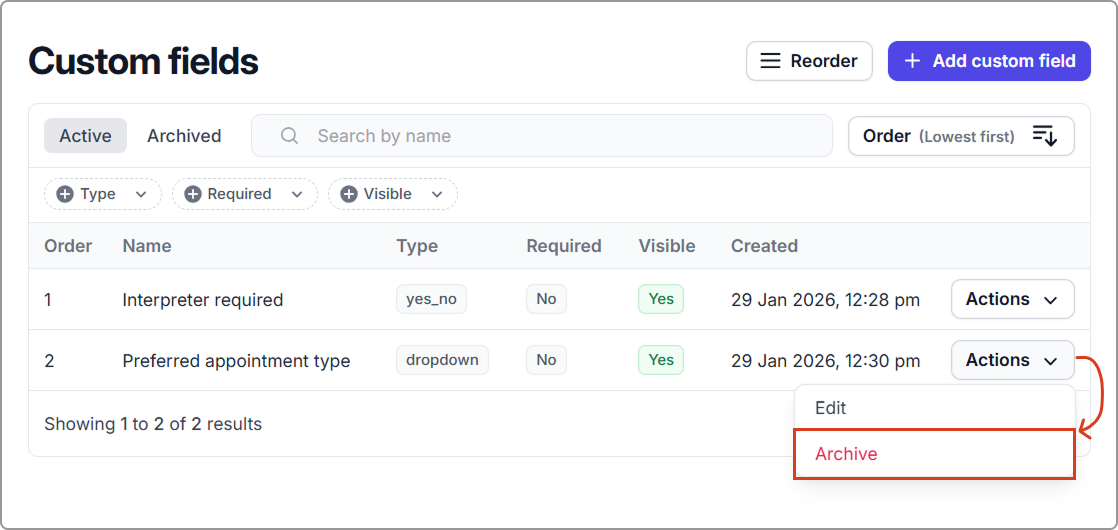
1. Go to **Settings** → **Custom fields**.
2. Find the field and click **Actions** → **Archive**.
**What happens when archived**
* The field is removed from active use and can’t be filled out for clients.
* Any values already saved for clients are kept. If you restore the field later, those previous values will appear again.
**Restore an archived field**
1. Go to the **Archived** tab.
2. Find the field and click **Actions → Restore**.
> **Tip:** If you want to start fresh and not reuse previous client values, create a new custom field instead of restoring an archived one.
***
## Frequently asked questions
What does "visible" setting mean?
Visible controls whether the field shows on the client profile. If visible is off, the field is hidden on the profile and only appears when editing the client.
Can I change the field type later?
No. Field type cannot be changed after creation. Create a new custom field if you need a different type.
What happens when I rename an option in a choice field?
Renaming an option updates the option everywhere it is used, including on clients who already have it selected.
You can choose to archive an option in a choice field and create a new one.
I want to remove a field and also remove any previously entered values
Archive removes the field from view but retains the data if restored later. If you want a clean start, create a new custom field instead of restoring an archived one.
If I archive an option, does it remove it from clients who already selected it?
No. An option is a choice inside a field (for example, a dropdown value). Archiving an option prevents it from being selected going forward, but clients who already have it selected will keep it until their value is changed.